Setup
Setup Options
There are 2 available setup methods:
-
Quick-Start Repository: zero-code process that gets you started from a new FTC Repo which is ready to run. This is recommended for beginner to intermediate teams which are not looking into bringing their existing code as-is to the new repository.
-
In-Place Update: add Pond library reference to your existing code. This is recommended for advanced teams who want to be selective about how to integrate and which functionalities to depend on.
Recommendation: The Quick-Start Repository is the recommended way to get started as it allows you to quickly evaluate the library functionality with little to no effort. Additionally, setting up a new repository allows you to evaluate the Pond functionality without making any changes to your current robot project.
In any case, the 2 setup methods reach the same result since the Pond library is always used as a library reference. The only difference is the path used to get there.
Option 1: Quick-Start Repository
Fork the Repository (skip if evaluating only)
This step shows how to fork the starter repository in your Github account or team organization. This is recommended if you are planning to use the starter repository as the base for your team code.
You can skip this step if you only want to copy the code locally on your machine (or if you still don’t have a github account)
- Sign-in to Github
- Open https://github.com/FTC-23206/automaducks-pond-starter
- Click on Fork and provide the requested information (make sure you are making the fork to your Team organization or your own account)
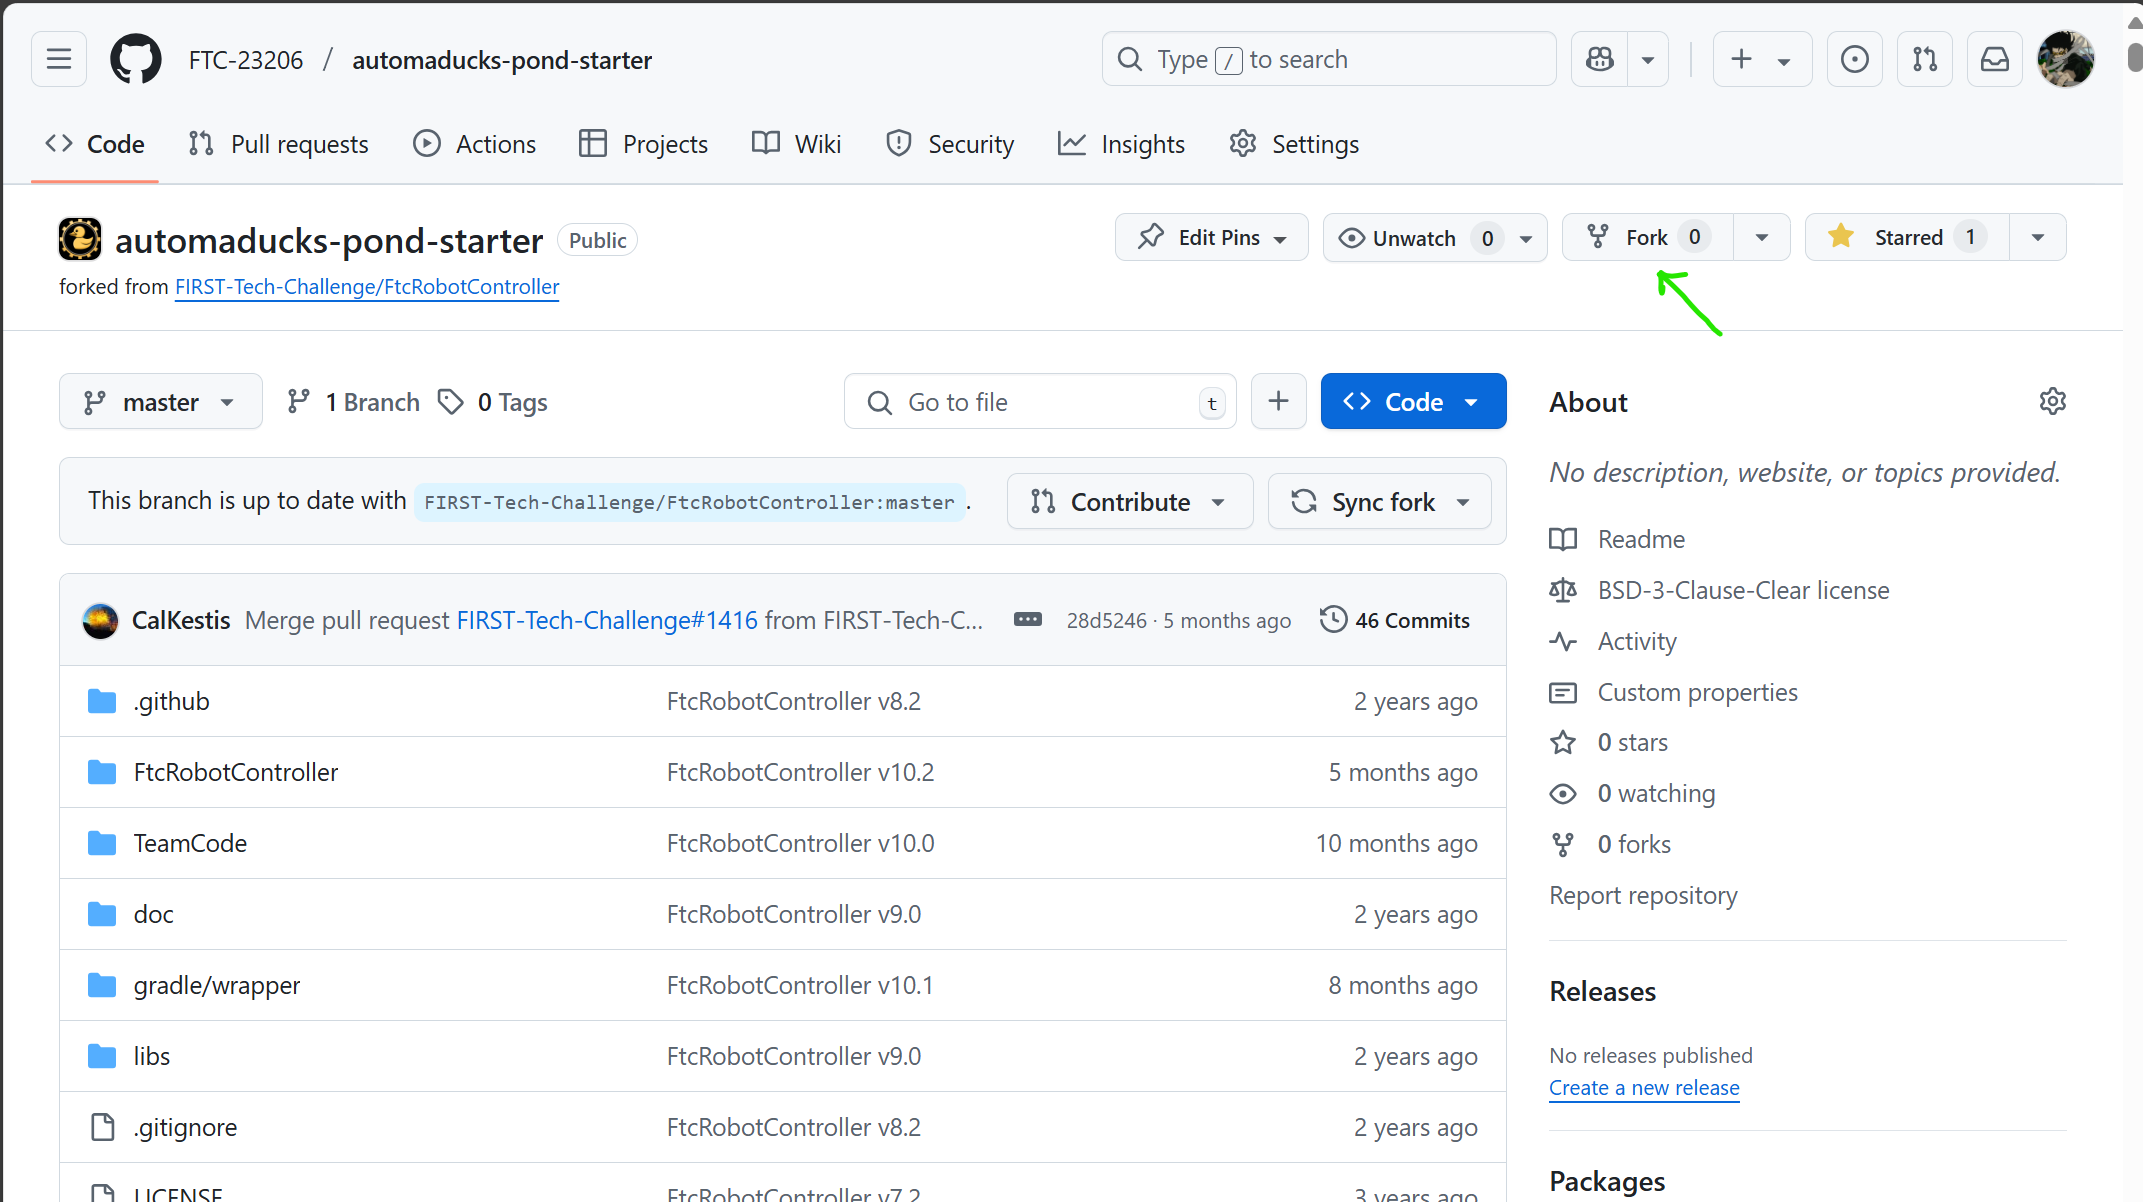
- Clone your own repository so you can continue to make changes to your robot project.
Clone the Repository
This step downloads the code to your machine and allows you to create the FTC Android Studio project.
From Android Studio
- Install Android Studio from https://developer.android.com/studio
- Open Android Studio and click ‘Clone Repository’
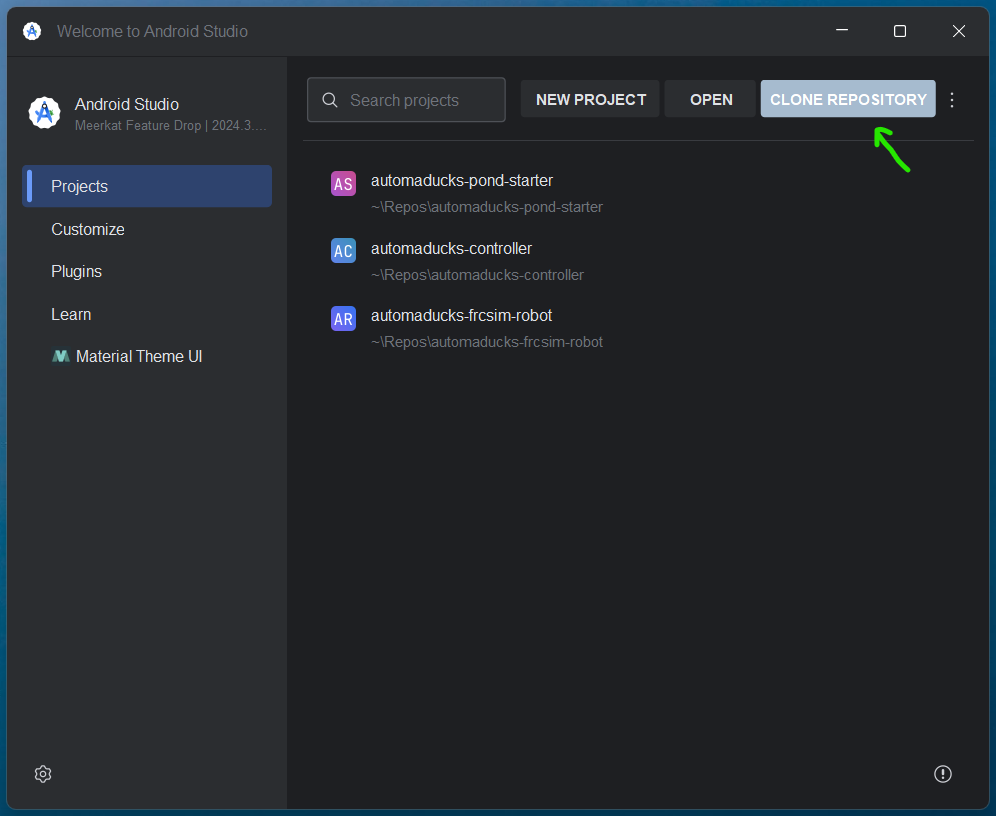
- Give the repository URL:
- Give the URL of your forked repository.
- If you’ve decided to to skip the fork step, use
https://github.com/FTC-23206/automaducks-pond-starter.git
From Command Line (Advanced)
- Install git from https://git-scm.com/downloads
- Open
Command PromptorTerminaland navigate to the desired repository location - Clone the Pond-Starter repository:
-
If you forked the repository:
git clone URL_TO_YOUR_FORKED_REPOSITORY -
If you skipped forking the repository:
git clone https://github.com/FTC-23206/automaducks-pond-starter.git
-
- Open the the root of the repository with Android Studio
Build the Project
At this point you should be able to successfully build the project:
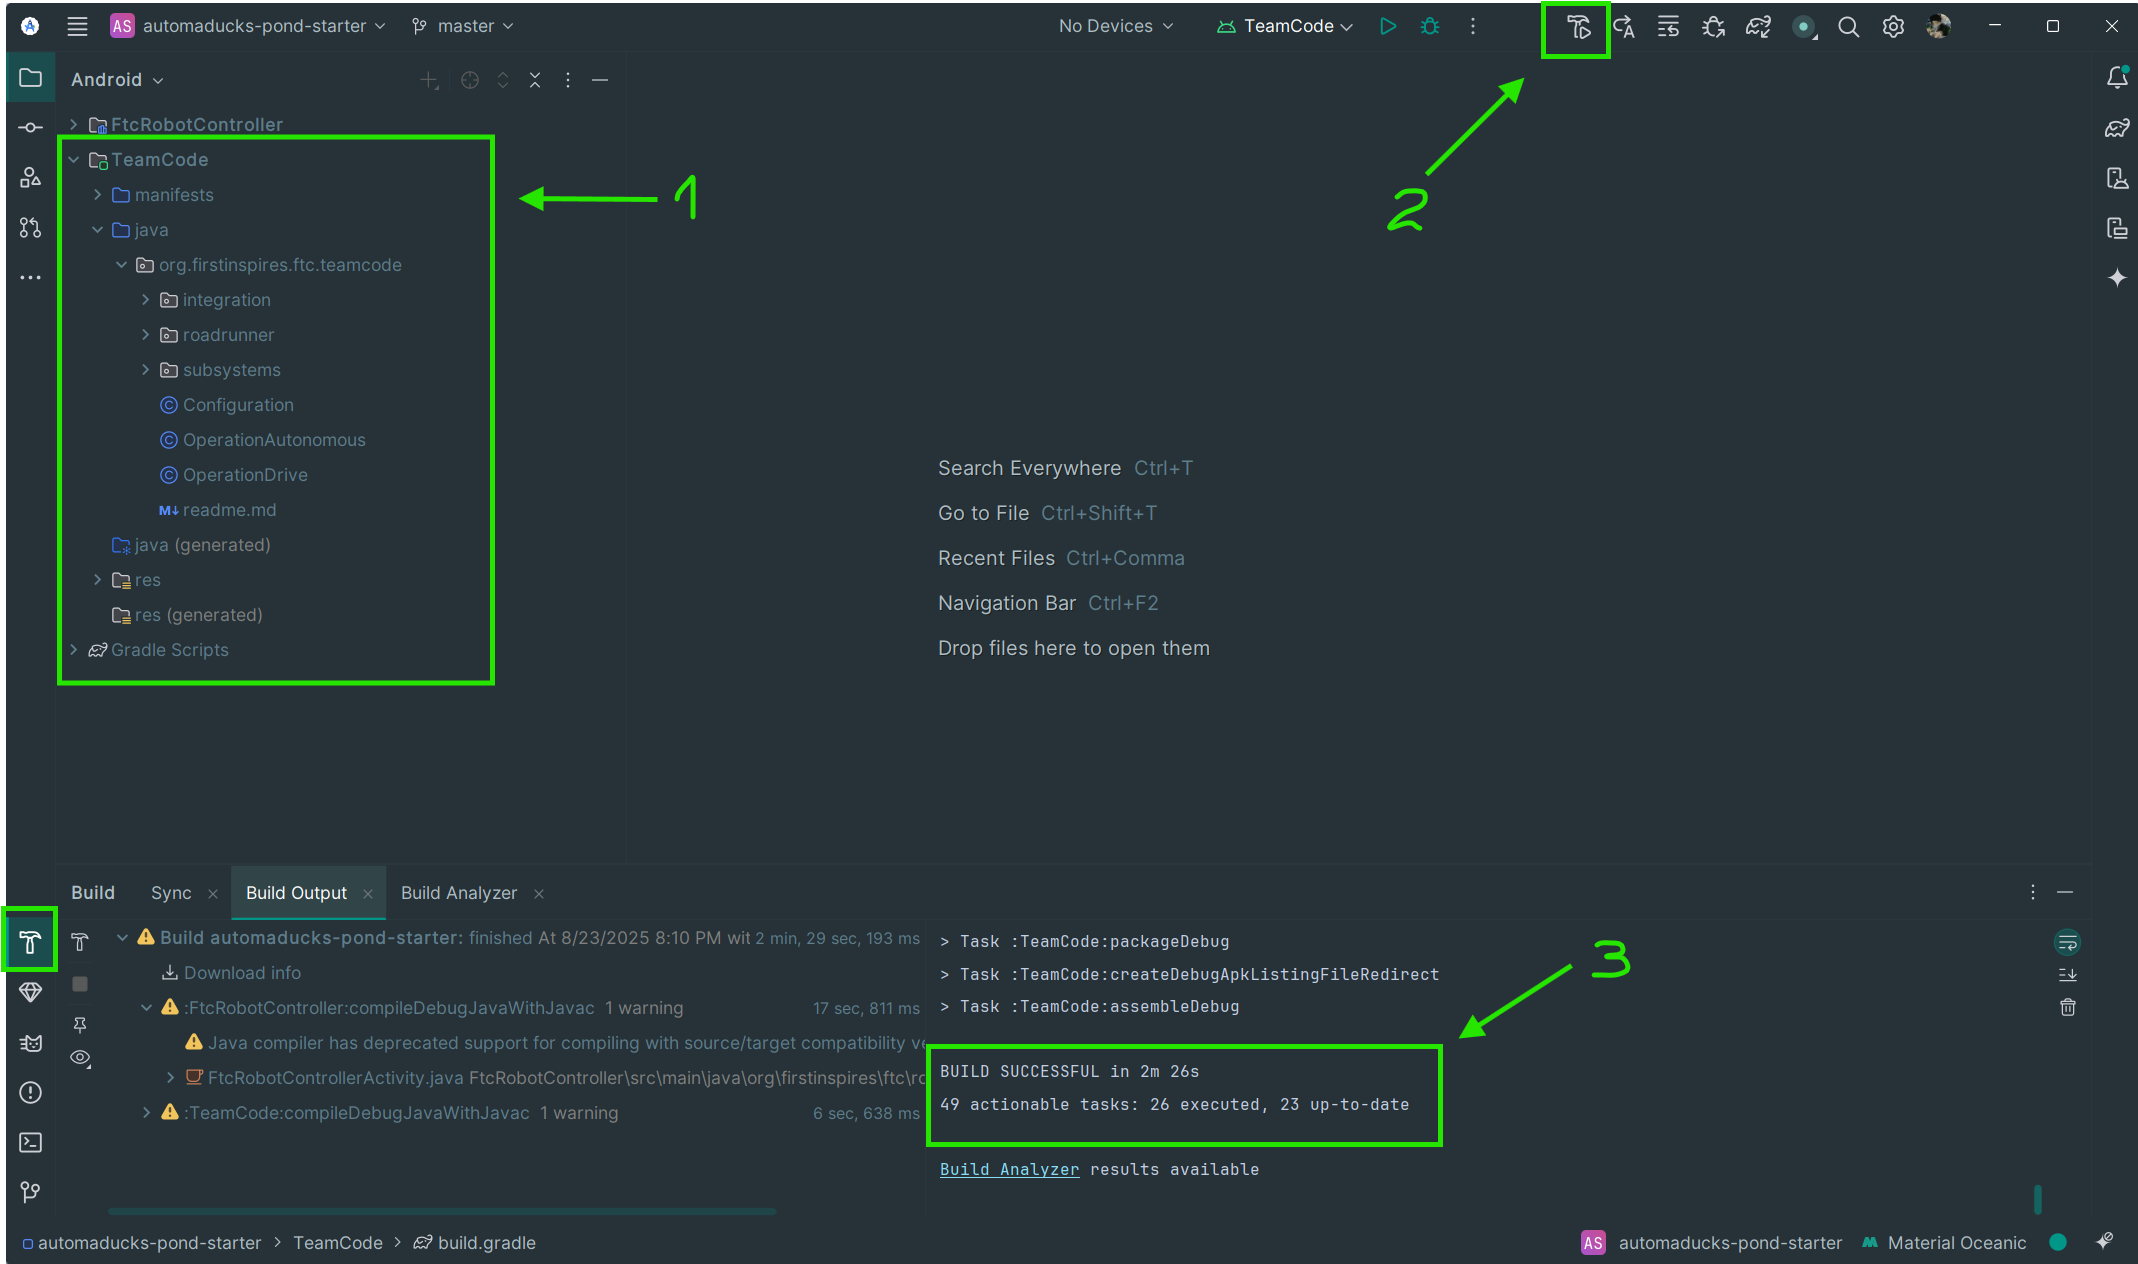
- Shows the project files
- Click on the ‘Make’ button
- Once it completes, it should show a successful build operation.
Now learn how to run and modify the code on the Getting Started page.
Option 2: In-Place Update
Add the Pond package reference (Required)
- Make sure your
TeamCodeproject successfully builds in Android Studio (F7) - Add the following to your Team Code gradle file
File:
(RepositoryRoot)\TeamCode\build.gradledependencies { implementation project(':FtcRobotController') // Pond Library Reference implementation 'com.automaducks:pond:0.9.2' } - Sync the project with gradle files (
CTRL+SHIFT+O) - Rebuild
TemCodeproject (F7)
After a successful build, you are ready to start leveraging the Pond libraries.
Add FTC Dashboard and Road Runner (Recommended)
This is not require but Pond is made to work well with FTC dashboard as it can leverage dynamic configuration changes and graphing.
-
Similar to the above, update your Team Code
build.gradleper below:// // build.gradle in TeamCode // // Most of the definitions for building your module reside in a common, shared // file 'build.common.gradle'. Being factored in this way makes it easier to // integrate updates to the FTC into your code. If you really need to customize // the build definitions, you can place those customizations in this file, but // please think carefully as to whether such customizations are really necessary // before doing so. // Custom definitions may go here // Include common definitions from above. apply from: '../build.common.gradle' apply from: '../build.dependencies.gradle' android { namespace = 'org.firstinspires.ftc.teamcode' packagingOptions { jniLibs.useLegacyPackaging true } } repositories { maven { url = 'https://maven.brott.dev/' } } dependencies { implementation project(':FtcRobotController') // Pond implementation 'com.automaducks:pond:0.9.2' // ACME Libraries implementation 'com.acmerobotics.roadrunner:core:1.0.1' implementation 'com.acmerobotics.dashboard:dashboard:0.5.1' } - Sync the project with gradle files (
CTRL+SHIFT+O) - Rebuild
TemCodeproject (F7)
Integrating with Pond
Continue to Pond Integration for information on how to integrate the pond library on your project.